All posts by Stacey Rodriguez

Elden Ring PvP: The Left-Hand Main Weapon Setup

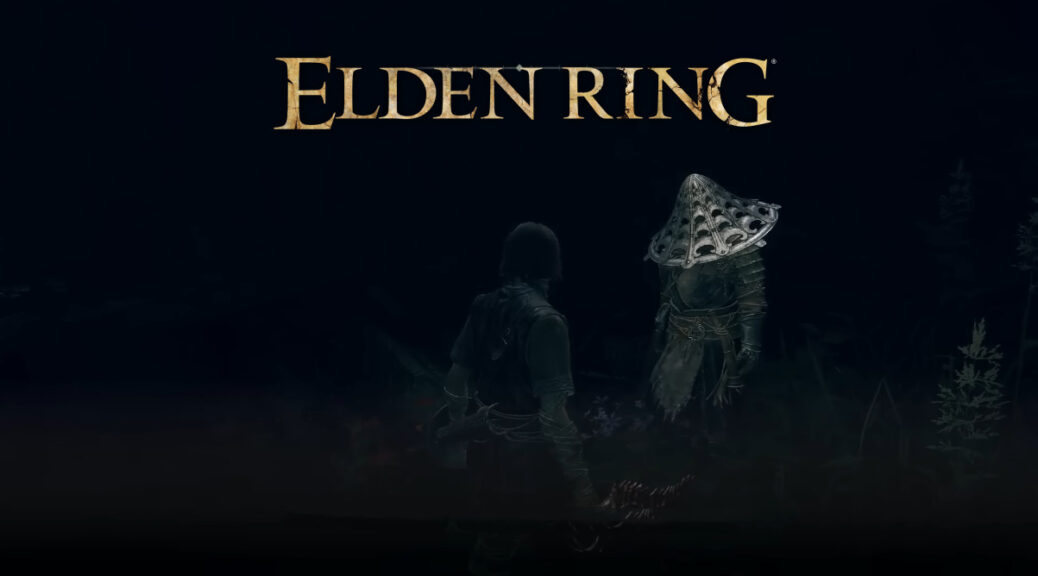
Today, we embark on an exciting journey into the realm of PvP builds in FromSoftware’s masterpiece, Elden Ring. Join me, as we delve into the intricacies of a highly effective build – the left-hand main weapon setup. This build, popularized, offers a unique approach to combat that optimizes versatility and efficiency in battle.

Picture this: you’re facing off against formidable opponents in the chaotic world of Elden Ring PvP. Every move counts, and having the right setup can make all the difference between victory and defeat. That’s where the left-hand main weapon setup shines.

Traditionally, PvP builds in Elden Ring often prioritize having a sword in the right hand and a shield in the left for defense and parrying. However, this setup comes with limitations. Swapping to offensive Ashes of War abilities can be cumbersome, as the shield’s parry takes priority, requiring you to two-hand your weapon before accessing your desired Ash.

But fear not, for the left-hand main weapon setup offers a solution to this dilemma. By wielding your main weapon in the left hand and a parry shield in the right, you gain quick access to both offensive and defensive capabilities without sacrificing efficiency. No more delays in unleashing devastating Ashes of War abilities when the situation demands it.

Imagine the freedom of seamlessly transitioning between your preferred weapon and a wide array of Ashes, all at your fingertips. With this setup, you have the flexibility to adapt to any combat scenario, whether you’re facing a lone opponent or a group of adversaries.

Of course, mastering this setup requires practice and a keen awareness of your stamina and equipment load. Heavy weapons may tip the scales and hinder your mobility, so choose your loadout wisely to maintain agility while wielding your chosen arsenal.

Speaking of arsenal, the beauty of the left-hand main weapon setup lies in its versatility. You’re not confined to a single weapon type; rather, you can experiment with different weapons and playstyles while retaining access to essential Ashes of War abilities. Whether you prefer the brute force of a greatsword or the finesse of a rapier, the choice is yours.

In my testing, I’ve found this setup particularly effective for strength builds, where raw power meets tactical finesse. By carefully managing your resources and adapting to the flow of combat, you can become a formidable force on the battlefield.

But enough theorycrafting; let’s put this build to the test in the crucible of PvP combat. Join me as we invade the shaded castles and engage in thrilling duels against fellow Tarnished. From epic showdowns to strategic skirmishes, we’ll explore the full potential of the left-hand main weapon setup in action.

As we traverse the treacherous landscapes of Elden Ring, remember to stay adaptable, stay vigilant, and above all, stay determined. The path to victory may be fraught with challenges, but with the right build and the right mindset, nothing is insurmountable.

So, fellow Tarnished, are you ready to embrace the left-hand main weapon setup and conquer the PvP arenas of Elden Ring? The journey awaits, and the glory of victory beckons. Until next time, may your parries be precise and your strikes true. Farewell, and may the tarnished light guide your way.

Want a better gaming experience in Elden Ring? MMOexp’s buy Elden Ring Runes service can help you achieve your goals easily.

Skull and Bones: Enhancing Po8 Runs for a More Dynamic Experience

Po8 runs in Skull and Bones are currently lacking in excitement and challenge, often feeling like a monotonous chore. To address this issue and inject more thrill into the gameplay, I propose a revamp of the Po8 system with the following ideas:

1, Expanded Banking Options: Allow players to bank Po8 at any disembark point, not just at designated locations like St. Anne or Telok Penjarah. This change would increase flexibility and efficiency during Po8 runs, eliminating the need for players to trek back to home base after collecting only a few Po8. It would also reduce the feeling of being trapped into hitting as many stops as possible in one go.

2, Risk-Reward Mechanic: Introduce a mechanic similar to the Plague Captain heads, where the more manufactories players visit without banking, the more enemies are attracted to them. This could manifest as a faster spawn rate or higher numbers of enemies, or both. Additionally, implement a bonus system tied to the number of stops visited without banking. The longer players go without banking, the larger the bonus to their Po8 total, offering increased rewards but also escalating the risk of encountering more formidable adversaries.

3, Mini-Boss Encounters: After visiting a certain number of stops without banking (e.g., 10 stops), trigger a mini-boss encounter. This mini-boss would be tougher than a normal rogue but still solo-able. Defeating the mini-boss would reset the enemy spawn timer but not the bonus counter, providing players with a strategic decision to make regarding risk and reward. However, failing to defeat the mini-boss would result in the loss of all accumulated Po8, adding an element of consequence to the decision-making process.

These proposed changes aim to make Po8 runs more engaging and dynamic, offering players greater control over their risk-reward balance. By providing options for players to customize their gameplay experience based on their preferred level of challenge, the revamped Po8 system would enhance the overall enjoyment and longevity of Skull and Bones.

Thank you for reading, if you need PO8 service, pls buy Skull and Bones Boosting service, do it easy and cheap. We also provide cheap Skull and Bones Items and silver, welcome to MMOexp.com!

A Guide to Last Epoch’s Best Classes in 2024

If you’re diving into Last Epoch in 2024, you’re in for a treat. With a plethora of classes and subclasses, the game offers a diverse range of playstyles to suit every gamer’s preferences. In this comprehensive guide, we’ll explore the top-tier classes and their respective subclasses, providing insights into their strengths, weaknesses, and unique mechanics.

Understanding the Class Structure

Before we delve into the specifics, let’s clarify the class structure in Last Epoch. The game features five main classes, each with three subclasses. Think of the main classes as broad categories and the subclasses as the specific class you’ll be playing. For instance, if you’re interested in playing the Necromancer, you’d choose the Acolyte as your main class and the Necromancer as your subclass.

Now that we’ve got the basics covered, let’s dive into the rankings.

  1. Sentinel

The Sentinel class boasts three formidable subclasses: Void Knight, Forge Guard, and Paladin.

Void Knight (B Tier): Specializing in void damage, the Void Knight brings versatility to the battlefield with its ability to create echoes of skills, amplifying its offensive capabilities.

Paladin (A Tier): Harnessing the power of fire and healing, the Paladin excels in both offense and defense. With bonuses to fire, lightning, and physical damage, as well as the unique ability to scale adaptive spell damage while using a shield, the Paladin offers a well-rounded playstyle.

Forge Guard (B Tier): Focused on physical damage and armor, the Forge Guard supports both two-handed and sword-and-board playstyles. While its defensive capabilities are commendable, it lacks the versatility of other subclasses.
  1. Mage

The Mage class offers three distinct subclasses: Sorcerer, Spellblade, and Runemaster.

Sorcerer (A Tier): A quintessential spellcaster, the Sorcerer specializes in ranged spells and elemental AoE damage. With support for fire, lightning, and cold damage, as well as bonuses to mana and spell damage, the Sorcerer packs a punch in combat.

Spellblade (C Tier): Blending melee and spellcasting, the Spellblade offers a unique playstyle centered around building up damage and unleashing devastating bursts. While its synergy between melee and spells is intriguing, it lacks the finesse of other subclasses.

Runemaster (A Tier): Mastering elemental skills and runes, the Runemaster boasts a staggering array of spells derived from rune combinations. With nearly limitless possibilities, the Runemaster offers unparalleled flexibility in combat.
  1. Acolyte

The Acolyte class presents three compelling subclasses: Leech, Necromancer, and Warlock (in development).

Leech (A Tier): Embracing dark arts and blood magic, the Leech sacrifices health to increase its power, offering a unique risk-reward playstyle. With support for physical, necrotic, and poison damage, the Leech is a force to be reckoned with on the battlefield.

Necromancer (S Tier): The epitome of minion mastery, the Necromancer commands armies of undead minions, buffing them and utilizing them in various destructive ways. With unparalleled versatility and synergy between minion and master, the Necromancer reigns supreme.

Warlock (TBD): While details about the Warlock subclass are scarce due to its ongoing development, it promises to delve into forbidden arts and curses, adding a layer of intrigue to the Acolyte class.
  1. Primalist

The Primalist class offers three primal subclasses: Beastmaster, Shaman, and Druid.

Beastmaster (B Tier): Forming bonds with powerful companions, the Beastmaster excels in summoning and supporting allies in combat. With strong support for physical and poison damage, as well as unique aspects for self-buffs, the Beastmaster offers a dynamic playstyle.

Shaman (C Tier): Primarily a totem user, the Shaman combines totems with spellcasting for a versatile approach to combat. While its cold and lightning damage support is notable, it lacks the potency of other subclasses.

Druid (S Tier): Masters of transformation, Druids shapeshift into various forms to adapt to any situation. With access to bear, spriggan, and swarm forms, as well as support for physical, poison, cold, and lightning damage, the Druid offers unmatched versatility and power.
  1. Rogue

Last but not least, the Rogue class introduces three stealthy subclasses: Bladedancer, Marksman, and Falconer (in development).

Bladedancer (A Tier): Embodying the ninja assassin archetype, the Bladedancer excels in close-quarters combat with a focus on physical and poison damage. Its shadow daggers mechanic adds a layer of complexity to its playstyle, making it a formidable force on the battlefield.

Marksman (E Tier): Mastering the bow and quiver, the Marksman specializes in ranged combat with support for physical, poison, fire, lightning, and cold damage. Despite its diverse damage options, the Marksman falls short due to its lack of defensive capabilities.

Falconer (TBD): With details about the Falconer subclass still under wraps, little is known about its mechanics and playstyle. However, its emphasis on tactical prowess and the use of birds of prey promises to bring a fresh dynamic to the Rogue class.

In Conclusion

As you embark on your journey through Last Epoch, remember that each class and subclass offers a unique experience. Whether you prefer summoning hordes of undead minions, wielding powerful elemental spells, or mastering the art of stealth and precision, there's a class for you. Experiment with different builds, explore the vast world of Eterra and uncover the secrets that lie within. The fate of the epochs rests in your hands. Choose wisely, adventurer, and may your journey be filled with glory and triumph. 

If you found this guide helpful or interesting, please consider subscribing to MMOexp to get more content like this. And buy Last Epoch Gold through our website, you will get more discounts.

A Guide to Myth of Empires’ Proficiency Leveling

In the vast world of Myth of Empires, mastering your character’s physique and armor proficiency can be a daunting task. With the constant threat of battles and challenges looming, players seek efficient methods to enhance their skills. However, amidst the legitimate strategies lies a controversial yet effective approach – the cheesy method. In this guide, we delve into the realm of unconventional tactics to level up your physique and armor proficiency swiftly. Brace yourselves as we embark on this unconventional journey through Myth of Empires.

The Cheesy Setup:

Before diving into the cheesy exploits, one must prepare adequately. To set up your proficiency leveling farm, gather the following materials: six foundations, twenty walls, three doors, and six ceilings. Opting for sturdy materials like clay or steel is advisable to withstand the onslaught of relentless foes. Additionally, ensure you have a bed and chests for storage to sustain your endeavor.

Choosing the Right Spot:

The key to successful proficiency leveling lies in selecting the perfect location. Look for areas teeming with adversaries, such as fox dens scattered across the map. These dens harbor a plethora of foxes ranging from levels 1 to 10, ideal for your leveling pursuits. Aim for spots with ample fox population to maximize efficiency.

Initiating the Process:

With your base established and the location secured, it’s time to commence the cheesy endeavor. Begin by blessing your boundary marker to boost proficiency gains. Utilize the proficiency blessing twice for optimal results, doubling your proficiency gain for one hour. This step sets the stage for accelerated skill development, laying the foundation for your journey ahead.

Engaging with the Foes:

Once prepared, venture into the midst of the foxes and provoke their aggression. Aggravate the creatures to draw their attention towards you, initiating the leveling process. Position yourself strategically within your fortified base, allowing the foxes to assail you relentlessly. Embrace the onslaught as each blow contributes to the advancement of your physique and armor proficiency.

Optimizing the Experience:

To expedite your progress, equip yourself with suitable armor, preferably heavy for enhanced defense. The durability and protection afforded by heavy armor prolong your endurance amidst the relentless assault. Channel your focus on the armor being hit, as proficiency gains are contingent upon the targeted equipment. Maintain vigilance and adjust your positioning to ensure maximum efficiency.

Navigating Challenges:

While immersed in the leveling process, remain vigilant of potential threats. On PvP servers, the risk of encountering hostile players looms large. Mitigate the risk by concealing yourself within the confines of your base, shielded from prying eyes. Exercise caution to safeguard your progress and minimize disruptions to your proficiency leveling endeavor.

Embracing Persistence:

As the hours pass and proficiency levels soar, perseverance becomes your greatest ally. Endure the relentless barrage of attacks, steadfast in your pursuit of mastery. Monitor your health diligently, utilizing your bed for swift recovery upon incapacitation. Embrace the grind with unwavering determination, knowing that each blow endured brings you closer to proficiency perfection.

Conclusion:

In the realm of Myth of Empires, mastering your character’s physique and armor proficiency is a testament to your dedication and perseverance. While the cheesy method may raise eyebrows, its effectiveness in accelerating skill development cannot be denied. As you embark on this unconventional journey, tread carefully and embrace the challenges that lie ahead. With diligence and determination, you shall emerge victorious, wielding unparalleled prowess in the face of adversity.

By the way, do you want to get Myth of Empires weapons quickly? Accumulate enough Myth of Empires Copper Coins to stay one step ahead in the game. MMOexp.com offers you the best help. Good luck.

The Ashen Corsair Investigation Quest in Skull and Bones

Skull and Bones, the action-packed naval warfare game developed by Ubisoft, offers players an immersive experience as they navigate the treacherous waters of the Caribbean. Among its myriad quests and challenges, the Ashen Corsair Investigation Quest stands out as an intriguing adventure, available exclusively to players who own the Premium Edition of the game. In this comprehensive guide, we’ll delve into the steps required to initiate and complete this captivating quest.

Unlocking the Ashen Corsair Investigation Quest:

To embark on the Ashen Corsair Investigation Quest, players must first ensure they possess the Premium Edition of Skull and Bones. Upon accessing the Premium Edition content, navigate to the mailbox to open the Premium Edition letters. Progress through the game until reaching the Buccaneer rank, at which point investigations become accessible. These investigations, denoted by purple rumors scattered around St. Anne, can be activated by bribing NPCs.

Initiating the Quest:

Once investigations are unlocked, players must locate a specific newspaper between the warehouse and the mailbox in St. Anne. This newspaper will only appear after investigations have been unlocked. The first objective of the Ashen Corsair Investigation Quest is to commence plunder in Grande, a small port south of St. Anne. Upon reaching the first chest in the plunder, players acquire the next clue necessary for the investigation.

Finding the Clues:

After obtaining the clue from the plunder, navigate to the investigations menu and select the Ashen Corsair. Read the second page of the investigation to update its progress. The subsequent step involves locating a message in a bottle, situated north of the western basin. It’s crucial to differentiate the correct message from others nearby, as picking up the wrong bottle can lead to confusion. Referencing the investigation menu ensures the acquisition of the correct clue.

Locating the Ashen Corsair:

With the third clue in hand, players receive a rough estimate of the Ashen Corsair’s location. This elusive vessel roams the waters near the Three Brothers Outpost, located east of the player’s current position. While the Ashen Corsair’s precise location may vary, it typically resides northwest of the Three Brothers Outpost. Engage in battle with the Ashen Corsair and emerge victorious to obtain the final clue.

Conclusion:

The Ashen Corsair Investigation Quest in Skull and Bones offers players an enthralling journey through the Caribbean seas. From initiating the quest by unlocking investigations to deciphering clues and confronting the formidable Ashen Corsair, every step is filled with excitement and challenge. By following the guidelines outlined in this guide, players can navigate this quest with ease and unravel its mysteries to claim their rewards. So set sail, brave buccaneers, and may the winds of fortune guide you to triumph in your endeavors on the high seas of Skull and Bones!

For more guides and all the latest news about Skull and Bones, check out MMOexp. Cheap Skull and Bones Silver for sale here!