Diablo 4: Best Lunatic Warlock Build for Endgame Dominance in Season 13

The Lunatic Warlock has quickly emerged as one of the strongest and most entertaining builds in Diablo 4. Combining devastating AoE damage, rapid mobility, and explosive Shadow-based mechanics, the build has become a favorite for players looking to dominate high-end content while farming efficiently.

According to recent build updates and community discussions, the Lunatic Warlock excels in Nightmare Dungeons, Infernal Hordes, and Pit pushing thanks to its incredible screen-clearing potential and fast-paced gameplay.

For players searching for powerful endgame builds capable of farming elite Diablo 4 Items, the Lunatic Warlock is currently one of the best options available.

Why the Lunatic Warlock Is So Powerful

The biggest strength of the Lunatic Warlock build is its ability to combine a massive AoE burst with extremely fast clear speed. Unlike slower damage-over-time builds, Warlock setups can chain explosions together and wipe entire rooms almost instantly.

This gives the build several advantages:

·Faster dungeon completion times

·Strong elite pack clearing

·Excellent mobility for farming routes

·High survivability through mobility and crowd control

Many players compare the build’s pacing to some of the fastest builds ever seen in Diablo 4. While other classes rely on careful positioning or setup, the Lunatic Warlock can aggressively push through dense enemy packs with constant pressure.

That speed matters enormously in the current endgame because farming efficiency directly impacts progression, crafting, and loot acquisition.

Core Skills for the Lunatic Warlock

Most versions of the Lunatic Warlock revolve around chaining Shadow-based abilities and explosive interactions together for maximum damage output.

Key abilities typically include:

·Apocalypse – Massive AoE burst and screen-clearing damage

·Soulfire – Reliable sustained damage and resource generation

·Hex mechanics – Debuffs and enemy amplification

·Mobility skills – Fast repositioning and survivability

·Curse synergies – Amplify Shadow and chaos-based damage

The build’s core gameplay loop focuses on rapidly applying debuffs before triggering devastating AoE bursts that chain through enemy groups.

Once optimized, the build creates the kind of “entire screen explodes” gameplay that many players chase in ARPG endgame content.

Best Diablo 4 Items for the Lunatic Warlock

As most top-tier endgame builds, the Lunatic Warlock scales heavily with gear quality.

Several high-end Diablo 4 Items dramatically improve performance by increasing Shadow damage, cooldown reduction, resource generation, and survivability.

Important gear priorities include:

·Shadow damage multipliers

·Cooldown reduction

·Critical strike scaling

·Resource regeneration

·Movement speed bonuses

Many players focus on Greater Affix gear and Mythic-quality upgrades to fully unlock the build’s potential.

Because the build depends heavily on rapid ability rotations, cooldown reduction becomes especially valuable. A fully optimized Warlock can maintain nearly constant offensive pressure without downtime.

This is one reason why farming high-quality gear is so important for the build’s long-term progression.

Crafting and Material Costs

One major downside of the Lunatic Warlock is how resource-intensive optimization can become.

Perfecting the build often requires:

·Multiple temper rerolls

·Masterworking upgrades

·High-end Aspect imprinting

·Repeated affix optimization

·Constant gold investment

As players chase better Diablo 4 Items, crafting costs increase dramatically. Materials like Obducite, Forgotten Souls, and rare boss resources disappear quickly during endgame optimization.

Because of this, many players spend significant time farming crafting resources or choose to buy D4 materials to reduce grind time and accelerate progression.

This trend has become increasingly common in later seasons, where endgame crafting systems demand enormous resource investment.

Best Activities for Lunatic Warlock Farming

The Lunatic Warlock excels in nearly every high-density activity currently available in Diablo 4.

Top farming activities include:

Nightmare Dungeons

The build’s AoE burst allows it to clear dense enemy packs rapidly while maintaining excellent mobility between encounters.

Infernal Hordes

Warlocks thrive in wave-based content where enemies spawn continuously and group tightly together.

The Pit

High-end versions of the build perform extremely well in scaling Pit content thanks to strong burst damage and mobility.

Open-World Farming

Fast movement speed and screen-clearing damage make the build highly efficient for farming materials and elite enemies.

This efficiency is especially important for players targeting rare crafting resources and top-tier Diablo 4 Items.

Community Reactions to the Build

The Diablo community has responded very positively to the Lunatic Warlock since its rise in popularity.

Many Reddit discussions describe the build as one of the most satisfying playstyles currently available because of its explosive visuals and aggressive pacing. Players frequently compare its screen-clearing power to older Diablo 3 speed-farming builds.

Some Necromancer players have even pointed to Warlock builds as evidence that certain older archetypes need larger AoE scaling or modernized mechanics to keep pace.

Still, most players agree that the Lunatic Warlock represents the kind of fast, explosive gameplay modern ARPG fans enjoy most.

Strengths and Weaknesses

Strengths

·Incredible AoE damage

·Fast clear speed

·Excellent farming efficiency

·Strong mobility

·Fun, visually satisfying gameplay

Weaknesses

·Gear dependent at high tiers

·Expensive crafting requirements

·Requires cooldown optimization

·Can feel fragile without proper positioning

The build becomes significantly stronger as gear improves, meaning players willing to invest heavily into optimization will see the best results.

Why Farming Efficiency Matters More Than Ever

Modern Diablo 4 progression revolves around efficient farming loops. The faster you clear content, the more materials, gold, and gear upgrades you acquire.

That’s why builds like Lunatic Warlock are dominating the current meta.

Fast farming means:

·More crafting opportunities

·Faster Masterworking progression

·Better chances at elite loot

·Quicker access to endgame upgrades

As crafting systems continue to expand, the demand for materials also grows. Many players now focus heavily on efficient resource farming, or decide to buy D4 materials to keep pace with competitive endgame progression.

Final Thoughts

The Lunatic Warlock is one of the strongest and most exciting builds currently available in Diablo 4. Its combination of explosive AoE damage, rapid mobility, and efficient farming potential makes it a top-tier choice for players who enjoy fast-paced gameplay.

Path of Exile 3.28 League Starter Build Rankings

When a fresh league begins in Path of Exile, your first character plays a huge role in how smoothly you progress. A strong league starter should help you move through the campaign quickly, handle early maps with ease, and scale into tougher content without requiring expensive gear right away. With Patch 3.28 shaking up balance and build viability, picking the right setup can make the difference between a frustrating start and a fast climb into endgame.

Before getting into specific builds, it’s important to understand what makes a great league starter in the first place. The best options typically share a few core traits: they don’t rely on rare or costly uniques, they level efficiently through Acts 1–10, they perform well in early mapping, they can handle bosses without major investment, and they have a clear upgrade path into late-game content.

With that in mind, here’s a refreshed look at some of the strongest league starters for 3.28.

Top-Tier League Starters

Explosive Arrow Ballista Elementalist

This build continues to dominate early progression thanks to its reliable damage and low-risk playstyle. By placing ballista totems that stack explosive fuses on enemies, you can deal massive ignite damage while staying safely out of danger.

Its biggest strength lies in bossing. Even with minimal gear, it can melt high-health targets quickly. Because the damage scales well without requiring expensive items, it remains one of the most efficient ways to push into endgame early. If your goal is to farm bosses as soon as possible, this build is hard to beat.

Poisonous Concoction Pathfinder

One of the smoothest starters available, Poisonous Concoction stands out because it doesn’t require a weapon at all. That alone simplifies gearing during the campaign and early mapping.

It offers excellent clear speed through poison stacking and strong survivability thanks to flask synergy. The overall progression feels very natural, making it a great option if you want a stress-free league start with steady power growth.

Lightning Arrow Deadeye

If speed is your priority, Lightning Arrow delivers. This build excels at clearing entire screens of enemies almost instantly, making it ideal for farming currency early in the league.

Deadeye’s projectile bonuses amplify its efficiency, allowing it to scale nicely even with basic rare gear. While it isn’t the strongest boss killer compared to some other options, its mapping speed makes it one of the best choices for players focused on fast farming strategies.

High-Performance Starters
Boneshatter Juggernaut

For players who prefer melee builds, Boneshatter remains a dependable choice. It comes with a built-in self-damage mechanic, but Juggernaut’s durability offsets that downside effectively.

This build is extremely tanky and can handle tough encounters without much risk. While it doesn’t clear maps as quickly as ranged builds early on, it offers strong single-target damage and becomes more efficient as your gear improves.

Cold Damage over Time Occultist

Cold DoT builds provide a steady, methodical playstyle that many players appreciate. Instead of burst damage, they rely on consistent damage over time effects that continue ticking while you focus on positioning.

This approach makes boss fights more manageable and reduces reliance on high-end gear. Combined with solid defensive tools, it’s a reliable option for players who prefer a more controlled pace.

Situational but Viable Options
Righteous Fire Inquisitor

Righteous Fire remains a popular pick due to its simple gameplay—you essentially burn everything around you while sustaining your own health. It’s easy to learn and comfortable for mapping.

However, it typically requires more investment before it feels strong in higher-tier content. Early progression is smooth, but scaling into late-game can become costly compared to top-tier starters.Unlock infinite possibilities by harnessing the power of POE currency from MMOexp!

Summon Raging Spirits Guardian

Minion builds are often a safe bet at league start, and this one offers solid boss damage along with good survivability. Your summoned spirits do most of the work, allowing you to focus on positioning and defense.

That said, minion behavior and scaling can feel inconsistent at times, which keeps it slightly behind the strongest options this patch.

No matter which build you choose, generating currency early is essential. Efficient Atlas progression, combined with mechanics like Essences, Expedition, or Harvest, can significantly boost your income.

Upgrading key gear pieces—such as weapons, amulets, and six-link items—can dramatically increase your power. Many players accelerate this process through smart trading, especially when demand is high at the start of a league. Others focus on accumulating resources quickly to craft their own upgrades and stay competitive.

A strong league starter isn’t just about early success—it should also open the door to your long-term goals. Most builds naturally transition into one of three paths:

Fast Mapping Builds focused on farming currency efficiently
Bossing Builds designed for pinnacle encounters
Currency Farmers that fund a second, more expensive character

Ultimately, the best choice depends on how you like to play. If you prefer safety and boss damage, totem-based setups stand out. If speed and farming efficiency are your focus, bow builds shine. And if you want a durable, close-range experience, melee options remain a solid pick.Don’t let a currency shortage hold you back—get your buy Path of exile currency at MMOexp now and thrive!

Choosing wisely at the start sets the tone for your entire league—so it’s worth picking a build that matches both your goals and your playstyle.

Where To Find Ship Models In Arc Raiders

With the release of the Riven Tides update, Arc Raiders introduced ship models as a new and valuable set of collectibles. These miniature vessels are more than just decorative trinkets-they play a key role in the game’s Last Resort event, rewarding players with merits that unlock exclusive in-game rewards. Unlike fixed collectibles in other games, ship models spawn randomly, making exploration and strategy essential to track them down. This guide breaks down the best locations, tips, and details to help you find all five ship models efficiently. You will also acquire more ARC Raiders Materials and items.

An Overview of Ship Models: Rarity and Rewards

There are five ship models in total, each varying in rarity and the number of merits they grant upon extraction. Merits are critical for progressing in the Last Resort event, allowing you to unlock rewards faster than relying solely on XP gain alone. The rarity tier directly impacts both the difficulty of finding the model and the merits it provides:

Wind Sprite (Common): 5 merits – The easiest to find, perfect for new players starting their collection.

Twilight Compass (Uncommon): 10 merits – Slightly harder to locate but still abundant in key areas.

Velocity (Rare): 25 merits – Requires targeted searching in specific zones to increase your chances.

Sirena Dorata (Epic): 50 merits – A rare find tied to high-value loot areas and specific map conditions.

Leviathan’s Crown (Legendary): 250 merits – The rarest and most valuable model, requiring luck and strategic farming.

The Best Map for Ship Models: Riven Tides

Ship models are exclusive to the Riven Tides map, a compact, coastal battlefield introduced in the Riven Tides update. Unlike other maps, Riven Tides features unique looting mechanics, including buried sand loot and dynamic spawn points for collectibles. The good news is that you can unlock Riven Tides immediately after completing the tutorial-no need to grind through dozens of raids first.

The map’s coastal and urban mix creates diverse spawn environments for ship models, from beachside resorts to industrial dockyards. Keep in mind that ship models do not have fixed spawn points; their locations change with each raid, so flexibility and thorough exploration are key to success.

Top Locations to Find Ship Models

1. Hotel Panorama Azzurro: The Go-To Spot for Common and Uncommon Models

Hotel Panorama Azzurro, a faded beachside resort on the western end of Riven Tides, is hands down the best location for finding ship models-especially the Common Wind Sprite and Uncommon Twilight Compass. These models often spawn on everyday surfaces throughout the hotel, blending into the environment.

Take your time to scan the hotel’s multiple floors. Check sofas in hallways, chairs and tables in lounges, and even window ledges and shelves on upper levels. Many players report finding Common and Uncommon models in almost every raid here, making it a reliable starting point for new collectors.

After collecting a model, use the Saltswept Hatch north of the hotel to extract quickly, ensuring you don’t lose your find in unexpected PvP encounters or Arc threats.

2. Beaches: The Key to Rare and Legendary Models

For players chasing the Rare Velocity, Epic Sirena Dorata, or Legendary Leviathan’s Crown, the beaches of Riven Tides are your best bet-especially when the Beachcombing minor map condition is active. This map condition reveals buried containers in the sand, which have a high chance of spawning high-rarity ship models.

To maximize your chances, equip a Dockmaster’s Detector before heading to the beach. This tool helps you locate the buried containers, which often hold valuable loot-including the elusive Epic and Legendary ship models. While luck still plays a role, combining the Beachcombing condition with the Detector significantly boosts your odds of finding these rare collectibles.

3. Dockyards and Port Authority Buildings: High-Reward, High-Risk Zones

Dockyards and Port Authority buildings are another prime location for ship models, particularly the Rare Velocity and Epic Sirena Dorata. These industrial zones are packed with containers and interactable objects, creating plenty of spawn points for collectibles.

Dockyards, such as the Stacking Yards, have a high density of loot spawns, making them ideal for efficient farming. Port Authority buildings, on the other hand, offer even higher reward potential but attract more players, increasing the risk of PvP combat. If you’re comfortable with a fight, these areas are worth exploring for high-rarity models.

4. Overlooked Spots: Tennis Courts and Hotel Complexes

Don’t overlook smaller, less crowded areas like tennis courts near the hotel complex. These open recreational zones have scattered loot points and are often ignored by other players, reducing competition. Ship models can spawn here on benches or near court boundaries, making them a low-risk option for solo players.

The hotel complex’s water slide area is also a notable spot for the Epic Sirena Dorata. This model has been confirmed to spawn on push carts along the water slide pathways, so keep an eye out for movable objects as you explore the area.

Pro Tips for Efficient Ship Model Farming

Prioritize early raids: Drop into Riven Tides early in a match to avoid competition, as other players will also be hunting for collectibles later in the game.

Stay vigilant: Ship models do not glow or have markers, so you’ll need to visually scan every surface-chairs, tables, shelves, and carts-to spot them. They blend easily into environmental clutter, so move slowly and deliberately.

Use your inventory wisely: Stash ship models in your safe pocket to prevent losing them if you’re downed or engage in combat. This ensures you don’t waste time re-finding a model you already collected.

Repeat raids: Since spawn points are random, consistency is key. Keep running raids on Riven Tides, and focus on the high-yield locations mentioned above to build your collection over time.

Why Ship Models Are Worth the Hunt

Beyond their merit rewards, ship models are a fun and engaging collectible that adds depth to Arc Raiders’ exploration loop. They encourage players to slow down and explore every corner of the Riven Tides map, rather than rushing through raids for combat alone.

Additionally, the Legendary Leviathan’s Crown and Epic Sirena Dorata are rare enough to become a badge of pride among players, showcasing your dedication to exploration and event progression. Whether you’re chasing event rewards or simply love collecting in-game trinkets, ship models are a valuable addition to your Arc Raiders experience. Players will thus gain more cheap ARC Raiders BluePrints, Coins, and other resources.

With these tips and locations in mind, you’ll be well on your way to collecting all five ship models. Remember to stay patient, explore thoroughly, and take advantage of map conditions like Beachcombing to boost your chances. Happy hunting, Raiders!

MLB The Show 26: Playing Smarter on the Mound Online

Pitching against real players in MLB The Show 26 is a completely different challenge compared to offline gameplay. Instead of predictable AI behavior, you’re facing opponents who adjust quickly, recognize patterns, and capitalize on mistakes. To consistently succeed in online modes—especially competitive formats like Diamond Dynasty—you need a thoughtful, flexible strategy on the mound.

Online matchups demand more awareness and adaptability than offline games:

Pattern Recognition – Opponents quickly learn your habits and adjust their swings.

Timing Pressure – Speed changes and slight delays make pitch variation more impactful.

Strategic Complexity – Success depends on combining pitch selection, sequencing, and placement while reading your opponent.

Grasping these differences is essential if you want to improve your win rate.

Proven Strategies for Online Pitching

1.Keep Your Pitch Mix Unpredictable

    Throwing the same pitch repeatedly is one of the fastest ways to lose control of a game. Variety is critical.

    Use fastballs to establish control of the count.

    Mix in breaking pitches to introduce movement.

    Add off-speed pitches to disrupt timing.

    The real key is unpredictability—changing both pitch type and speed so your opponent can’t anticipate what’s coming next.Skip the grind and play your way—MMOexp makes it easy to secure MLB The Show 26 Stubs quickly and safely.

    2.Focus on Accuracy and Location

      Even the fastest pitch is ineffective if it’s easy to hit.

      Aim for the edges of the strike zone instead of the center.

      Keep pitches low to reduce the risk of big hits.

      Alternate high and low locations to throw off timing.

      Consistent placement forces weaker contact and limits scoring opportunities.

      3.Identify and Exploit Tendencies

        Every player has habits, and recognizing them gives you an edge.

        Do they swing at pitches outside the zone?

        Are they stronger against certain pitch types?

        Do they struggle with specific locations?

        Adjust your pitch selection based on these observations to stay in control of each at-bat.

        4.Manage Pitchers Effectively

          Fatigue can quickly turn a strong performance into a collapse.

          Monitor pitch counts and stamina levels.

          Avoid leaving starters in once they begin to lose effectiveness.

          Use relievers wisely in key situations.

          Smart pitcher management keeps your staff effective throughout the game.

          5.Take Advantage of Mental Attributes

            Pitchers have psychological factors that influence performance:

            Clutch ratings affect performance in high-pressure moments.

            Confidence levels influence control and consistency.

            Using pitchers with strong mental attributes in critical situations can help stabilize your gameplay.

            Diamond Dynasty Pitching Tips

            Building a reliable pitching lineup is just as important as your in-game decisions:

            Maintain a balanced rotation with different strengths.

            Upgrade pitchers to improve control, velocity, and movement.

            Look for cost-effective players who provide strong value.

            Adjust your approach mid-game based on your opponent behavior.

            A well-rounded pitching staff gives you flexibility in any matchup.

            Mistakes That Hurt Your Performance

            Avoid these common errors:

            Repeating the same pitch sequences
            Relying only on speed instead of mixing pitches
            Ignoring opponent adjustments
            Leaving tired pitchers in too long

            Correcting these habits can significantly improve your results.

            Advanced Pitching Concepts

            To take your game to the next level, incorporate deeper strategies:

            Sequence variation – Change pitch order to stay unpredictable.

            Eye-level disruption – Mix high and low pitches to affect timing.

            Situational awareness – Adjust your strategy based on score, outs, and base runners.

            Advanced players think ahead, setting up hitters over multiple pitches rather than relying on single throws.

            Pitching online in MLB The Show 26 is about more than throwing strikes—it’s about controlling the pace of the game and staying one step ahead of your opponent. Build, upgrade, and conquer—MMOexp is your go-to destination for fast delivery and secure buy MLB 26 Stubs. By mixing pitches, mastering location, reading tendencies, and managing your roster effectively, you can consistently gain the upper hand.

            Approach each at-bat with a plan, stay adaptable, and avoid predictable patterns—those are the keys to becoming a dominant online pitcher.

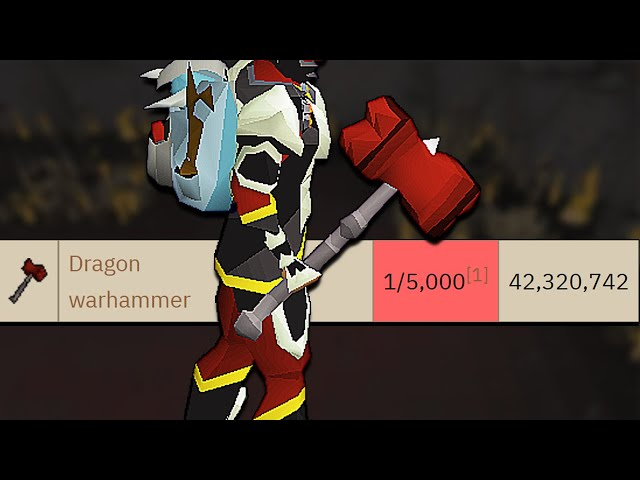
            Dragon Warhammer in OSRS: Features, Combat Strategies, and How to Obtain It

            In the rich and immersive world of Old School RuneScape, players are constantly seeking the most powerful weapons to enhance their combat performance. Among these iconic items, the Dragon Warhammer (DW) stands out as one of the most coveted and effective weapons in the game. Renowned for its serious damage output and unique special attack, the Dragon Warhammer is essential for players aiming to excel in both PvE and PvP content. In this article, we’ll explore its features, combat benefits, and strategies for acquisition, while also discussing how OSRS gold or even cheap OSRS gold can help players gain this legendary weapon faster.

            The Dragon Warhammer: Legendary Weapon of Gielinor

            The Dragon Warhammer has a storied place in OSRS lore. It is tied to the mythical dragons of Gielinor, creatures that have long captured the imagination of adventurers. As part of the Dragon equipment set, this weapon reflects the game’s attention to historical aesthetics and fantasy storytelling. Its design features intricate medieval detailing that showcases the craftsmanship and legendary status of the weapon.

            Crafted from the essence of dragons, the Dragon Warhammer is not just a relic; it embodies the ongoing struggle between adventurers and the monstrous creatures inhabiting the lands of Gielinor. Its formidable appearance alone can inspire awe, but it is the weapon’s combat capabilities that truly set it apart.

            Combat Advantages and Special Abilities

            The Dragon Warhammer is renowned for its high damage potential and versatility across different combat scenarios. Its stats include a significant strength bonus, making it highly effective for dealing heavy hits. But what truly distinguishes this weapon is its special attack, “Smash.”

            Smash Special Attack

            ·Damage Output: The Smash attack deals substantial damage, making it effective against high-defense targets.

            ·Defense Reduction: When executed, Smash has a chance to lower the enemy’s defense, allowing subsequent attacks to hit harder. This is especially valuable in PvP encounters, bossing, and raids.

            These features make the Dragon Warhammer a must-have weapon for players who want to control the pace of battle and maximize damage efficiency. Its ability to lower defenses is critical when facing tough bosses or other high-level players.

            PvE and PvP Versatility

            In PvE, the Dragon Warhammer is invaluable for fighting bosses like the Corporeal Beast, whose high defense can make prolonged battles challenging. By reducing enemy defenses, players can shorten fight durations and increase loot efficiency.

            In PvP scenarios, the weapon’s defense-lowering capability can provide a decisive advantage in duels. Players often craft specific builds around the Dragon Warhammer to capitalize on its offensive and defensive utility. This versatility ensures that the DW remains relevant across a wide spectrum of combat situations in OSRS.

            How to Obtain the Dragon Warhammer

            Acquiring the Dragon Warhammer is a challenging task that requires preparation, skill, and sometimes teamwork. The primary method of obtaining the weapon is by defeating the Corporeal Beast, one of the most formidable bosses in OSRS.

            Tips for Facing the Corporeal Beast

            1. Gear Up: Equip high-defense armor and gear that enhances your strength or magic capabilities. Protection against the Corporeal Beast’s powerful attacks is essential.

            2. Stock Up on Supplies: Bring high-healing food, stat-boosting potions, and prayer-restoring items. Sustaining your health and stats is crucial for survival.

            3. Form a Team: While solo attempts are possible, joining a group of skilled players improves your chances of success. Coordinated attacks reduce individual risk and make the fight more manageable.

            4. Learn Boss Mechanics: Understanding the Corporeal Beast’s attack patterns and special mechanics is vital. Effective counterstrategies can make the difference between victory and defeat.

            Given the challenge, many players choose to accumulate OSRS gold before attempting the fight. With enough currency, you can purchase the best gear and supplies, giving you a strategic advantage. Some players even opt to acquire cheap OSRS gold from trusted sources to save time and prepare faster for high-level encounters.

            Strategic Value and Community Impact

            The Dragon Warhammer is more than just a weapon-it’s a strategic tool that reshapes combat tactics in OSRS. Its ability to lower enemy defense makes it central to PvP strategies and crucial for efficient boss kills. Many clans and player communities host events showcasing this weapon, allowing players to demonstrate skill, coordination, and mastery in high-stakes battles.

            Owning a Dragon Warhammer also serves as a status symbol. Players who wield it are recognized for their dedication, combat expertise, and ability to overcome one of OSRS’s toughest bosses. It fosters a sense of accomplishment and prestige within the game’s community.

            Leveraging OSRS Gold to Accelerate Acquisition

            Preparation is key when pursuing the Dragon Warhammer, and having sufficient OSRS gold can make the process significantly easier. Gold allows players to:

            ·Purchase top-tier armor, weapons, and supplies

            ·Stock up on combat potions and high-healing food

            ·Reduce grinding time by acquiring essential resources quickly

            For those looking to save both time and effort, acquiring cheap OSRS gold from reputable sources can be an effective strategy. This approach ensures that you are battle-ready and can focus on strategic gameplay rather than resource accumulation.

            Conclusion

            The Dragon Warhammer is one of the most prestigious and powerful weapons in OSRS. Its high strength bonus, unique Smash special attack, and versatility across PvE and PvP content make it an essential addition to any serious player’s arsenal.

            Obtaining this legendary weapon requires defeating the formidable Corporeal Beast, careful preparation, and sometimes teamwork. By accumulating OSRS gold or acquiring cheap OSRS gold, players can purchase the necessary gear and supplies, significantly improving their chances of success.

            For dedicated adventurers, the Dragon Warhammer is more than just a weapon-it is a symbol of skill, strategy, and prestige in the vast world of Gielinor. Prepare wisely, fight strategically, and you may soon wield this legendary weapon to dominate both bosses and PvP opponents alike.